The Best Gel Nail Polish to Use with a UV Lamp
The Best Gel Nail Polish to Use with a UV LampGel nail polish has become incredibly popular in recent years due to its long-lasting and durable nature. When using gel nail polish, it is essential to cure it properly to achieve the best results. One of the most effective methods of curing gel polish is by using a UV lamp. In this article, we will discuss the best gel nail polish brands that work perfectly with a UV lamp to give you salon-quality results.1. OPI GelColor Nail PolishOPI is a well-known brand in the nail polish industry, and their GelColor line is no exception. This gel nail polish is highly pigmented and provides a glossy finish that lasts for weeks. When cured under a UV lamp, OPI GelColor dries quickly and remains chip-free for an extended period. With a wide range of shades to choose from, OPI GelColor is a reliable choice for those looking for a gel nail polish to use with a UV lamp.2. CND ShellacCND Shellac is another popular gel nail polish brand that is compatible with a UV lamp. This brand offers a vast selection of colors and finishes, allowing you to achieve various looks. The Shellac formula is designed to provide a high-gloss shine that lasts up to two weeks without chipping. By using a UV lamp, you can cure CND Shellac quickly and ensure a long-lasting, salon-quality manicure.3. Gelish Soak-Off Gel PolishGelish Soak-Off Gel Polish is a favorite among professional nail technicians and enthusiasts alike. This gel polish is easy to apply and provides a smooth, streak-free finish. With a UV lamp, Gelish Soak-Off Gel Polish cures in just 30 seconds, saving you time during your manicure. The brand offers a wide range of trendy shades, making it easy to find the perfect color for any occasion.4. Essie Gel CoutureIf you prefer a gel-like finish without the need for a UV lamp, Essie Gel Couture is an excellent option. This innovative formula provides long-lasting color and shine without the hassle of curing under a UV lamp. Essie Gel Couture is a two-step system that includes a color coat and a top coat, giving your nails a salon-quality look that lasts up to two weeks.5. Sally Hansen Miracle GelSally Hansen Miracle Gel is a budget-friendly option for those looking to achieve a gel-like manicure at home. This two-step system includes a color coat and a top coat that provides a high-shine finish. While it doesn't require a UV lamp for curing, using a UV lamp can help speed up the drying process and ensure a longer-lasting result.6. Gelaze Gel Nail PolishGelaze Gel Nail Polish is a professional-quality gel polish that is compatible with a UV lamp. This brand offers a wide range of vibrant and trendy colors that are chip-resistant and long-lasting. By using a UV lamp, Gelaze Gel Nail Polish cures quickly, allowing you to enjoy your manicure without the fear of smudging or chipping.7. Kiara Sky Gel PolishKiara Sky Gel Polish is a high-quality gel nail polish that is known for its durability and shine. This brand offers a vast array of colors, including glitter and shimmer options, allowing you to create unique and eye-catching manicures. When cured under a UV lamp, Kiara Sky Gel Polish provides a long-lasting finish that remains glossy and chip-free for weeks.8. Gelaze Harmony Gel PolishGelaze Harmony Gel Polish is a professional-grade gel polish that is designed to provide a salon-quality manicure. This brand offers a wide range of colors, from bold and vibrant to soft and subtle. When cured with a UV lamp, Gelaze Harmony Gel Polish dries quickly and remains chip-free for up to two weeks.9. Madam Glam Soak-Off Gel PolishMadam Glam Soak-Off Gel Polish is a cruelty-free and vegan gel polish brand that offers a wide range of colors and finishes. This gel polish provides a high-shine finish that lasts for weeks without chipping. By curing Madam Glam Soak-Off Gel Polish with a UV lamp, you can achieve a flawless and long-lasting manicure.10. Gelish PolyGelGelish PolyGel is a unique gel formula that combines the best qualities of both acrylic and gel nails. This product is applied like acrylic but cures under a UV lamp like gel polish. Gelish PolyGel is incredibly durable and provides a natural-looking finish. With proper application and curing with a UV lamp, Gelish PolyGel can last up to three weeks without lifting or chipping.Quote InquiryContact Us
Using an Electric Nail File: A Comprehensive Guide to Perfect Nails
Using an Electric Nail File: A Comprehensive Guide to Perfect NailsIntroduction: Achieving salon-worthy nails at home has never been easier with the advent of electric nail files. These handy tools offer precision and convenience, allowing you to shape, smooth, and polish your nails with ease. In this article, we will explore the various aspects of using an electric nail file, from its benefits and features to proper usage techniques and maintenance tips. Whether you're a nail enthusiast or simply looking to achieve a professional manicure at home, read on to discover the power of an electric nail file.1. Understanding Electric Nail FilesAn electric nail file, also known as an electric nail drill or e-file, is a device designed to shape and refine nails. It consists of a handpiece and interchangeable attachments, such as filing bits and buffers, that rotate at high speeds to remove excess nail length, shape the nails, and smooth out rough edges. Electric nail files are available in various models, offering a range of speed settings, power options, and additional features. Understanding the different components and functions of an electric nail file is essential for optimal usage.2. Benefits of Using an Electric Nail FileUsing an electric nail file offers numerous advantages over traditional manual nail files. Firstly, electric nail files save time and effort, as they work much faster and with greater precision. They also allow for greater control, ensuring even shaping and preventing accidental nail damage. Electric nail files can be particularly beneficial for individuals with thick or hard nails, as they can effortlessly file through tough surfaces. Additionally, electric nail files are versatile tools that can be used for various nail treatments, including shaping, buffing, and removing gel or acrylic extensions.3. Choosing the Right Electric Nail FileWhen selecting an electric nail file, several factors should be considered. Firstly, consider the power source. Electric nail files may be corded or cordless, each with its own advantages. Corded models provide consistent power but restrict mobility, while cordless models offer greater freedom of movement but may require frequent recharging. Additionally, consider the speed settings and attachments included with the electric nail file. Multiple speed options allow for greater control, while a variety of attachments cater to different nail treatment needs. Finally, check for additional features like LED lights, ergonomic designs, and noise reduction for a more comfortable and user-friendly experience.4. Preparing Your NailsBefore using an electric nail file, it is essential to prepare your nails properly. Start by removing any existing nail polish or coatings using a gentle polish remover. Next, trim your nails to the desired length using nail clippers or scissors. Use a nail buffer to smooth out any rough edges or ridges on the surface of the nails. Finally, wash your hands and dry them thoroughly to ensure a clean and oil-free surface. Proper nail preparation ensures better results and prevents unnecessary damage during the filing process.5. Using an Electric Nail File: Basic TechniqueUsing an electric nail file requires proper technique to achieve the best results. Begin by selecting the appropriate filing bit for your desired nail treatment. Attach the bit securely to the handpiece, ensuring it is properly aligned and tightened. Start the electric nail file at a low speed, gradually increasing it as needed. Hold the handpiece firmly but not too tightly, allowing the rotation of the filing bit to do the work. Move the file in gentle, circular motions along the edges and surface of the nail, avoiding excessive pressure or prolonged filing in one spot. Remember to regularly check your progress and adjust the shape or length as desired.6. Shaping and Smoothing the NailsOne of the primary uses of an electric nail file is shaping and smoothing the nails. To shape the nails, use a filing bit with the desired grit and shape, such as a barrel or cone-shaped bit. Gently file the sides of the nails, following their natural shape and tapering them towards the center. Avoid filing too deeply into the corners or sides, as this can weaken the nails. After shaping, switch to a buffing attachment, such as a soft buffer or polishing bit, to smooth out any rough spots and create a glossy finish. Buffing helps to refine the nail surface and enhances the overall appearance of the nails.7. Removing Gel or Acrylic ExtensionsElectric nail files can also be used to remove gel or acrylic nail extensions. Begin by removing any decorative elements, such as gems or decals, from the surface of the extensions. Choose a coarse-grit filing bit, such as a carbide or diamond bit, to file down the gel or acrylic layer. Start at a low speed and gradually increase as needed, moving the file in gentle back-and-forth motions. Be cautious not to file too deeply into the natural nails, as this can cause damage. Once the majority of the extension has been filed down, switch to a finer-grit bit to refine the surface and ensure a smooth transition between the natural and artificial nails.8. Maintaining and Cleaning Your Electric Nail FileTo prolong the lifespan and performance of your electric nail file, regular maintenance and cleaning are essential. After each use, remove any debris or nail residue from the attachments and handpiece using a brush or a specialized cleaning tool. Some electric nail files also come with detachable handpieces that can be sterilized using alcohol or a disinfectant solution. Additionally, periodically lubricate the moving parts of the electric nail file as recommended by the manufacturer. By keeping your electric nail file clean and well-maintained, you can ensure its optimal performance and longevity.9. Tips for Safe UsageWhile electric nail files are generally safe to use, it is essential to follow certain precautions to prevent any injuries or accidents. Always start with the lowest speed and gradually increase it as needed, avoiding excessive force or pressure. Take regular breaks during long filing sessions to prevent overheating of the electric nail file. If you experience any discomfort or pain during use, stop immediately and consult a professional. Additionally, keep the electric nail file out of reach of children and pets to avoid any mishaps. By using an electric nail file responsibly, you can enjoy its benefits and achieve beautiful nails without any risks.10. ConclusionUsing an electric nail file can revolutionize your nail care routine, offering efficiency, precision, and professional-quality results. Whether you're a nail enthusiast or a beginner, investing in a high-quality electric nail file can be a game-changer. By understanding the different aspects of using an electric nail file, from choosing the right model to proper usage techniques and maintenance, you can unlock the full potential of this versatile tool. So go ahead, grab your electric nail file, and embark on a journey to perfectly manicured nails in the comfort of your own home.Quote InquiryContact Us
Using a Nail Drill on Natural Nails: Everything You Need to Know
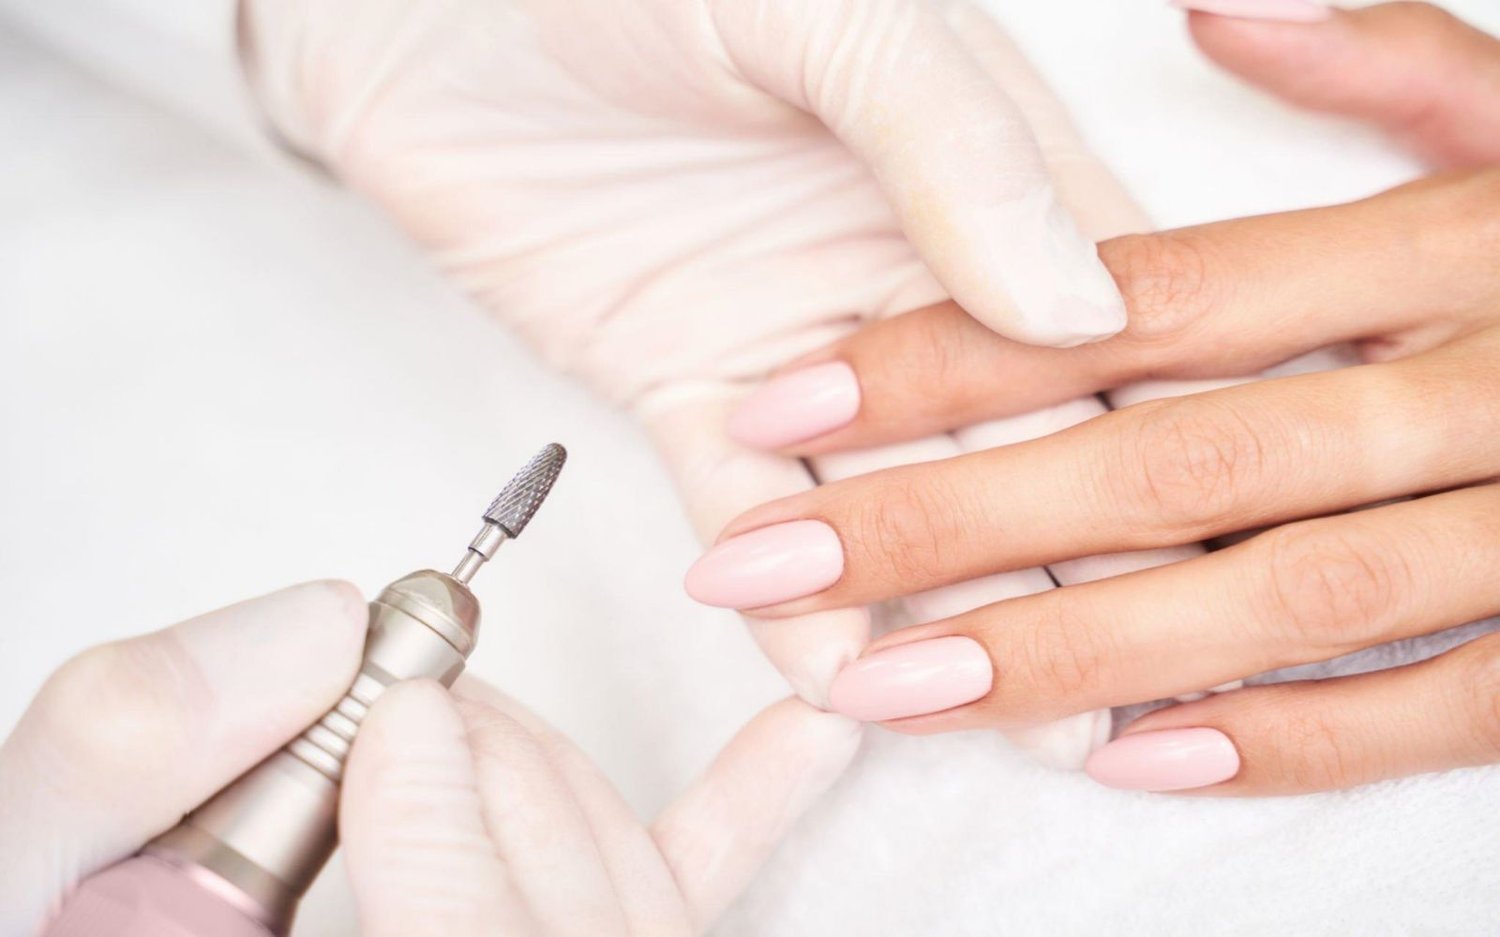
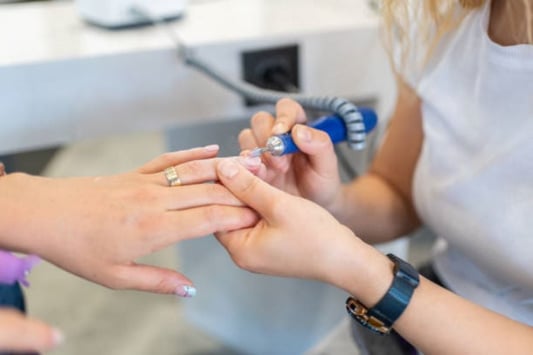
The Benefits of Using a Nail Drill on Natural NailsUsing a nail drill on natural nails has become increasingly popular among nail enthusiasts and professionals alike. This versatile tool offers a range of benefits that can enhance your nail care routine and help you achieve salon-quality results in the comfort of your own home.Understanding the Nail DrillA nail drill is a handheld device that features a rotating bit or burr, designed to file, shape, and buff the nails. It is commonly used in professional nail salons, but with the right knowledge and technique, it can also be used safely on natural nails at home.Preparation and Safety MeasuresBefore using a nail drill on your natural nails, it is essential to take certain precautions to ensure a safe and effective experience. Firstly, make sure your nails are clean and free from any polish or debris. Trim and shape your nails to your desired length before proceeding. It is advisable to wear safety goggles to protect your eyes from any flying particles, and always work in a well-ventilated area to avoid inhaling dust.Choosing the Right BitOne of the key aspects of using a nail drill on natural nails is selecting the appropriate bit for the task at hand. There are various types of bits available, each with a specific purpose. For example, a fine-grit sanding band can be used to shape and shorten the nails, while a buffing bit can smooth out any ridges or imperfections. Experiment with different bits to find the ones that work best for your nails.Proper Technique and PressureWhen using a nail drill on natural nails, it is crucial to use the correct technique and apply gentle pressure. Start by holding the drill at a comfortable angle and gently place the bit on the surface of the nail. Avoid applying too much pressure, as this can lead to nail damage or discomfort. Allow the drill to do the work and guide it in the desired direction for optimal results.Maintaining Nail HealthWhile a nail drill can be a valuable tool in your nail care routine, it is essential to prioritize the health of your natural nails. Avoid excessive drilling or filing, as this can weaken the nails and make them more prone to breakage. Take breaks between drilling sessions to allow your nails to recover and breathe. Additionally, regularly moisturize your nails and cuticles to keep them hydrated and nourished.Addressing Common ConcernsMany individuals have concerns about using a nail drill on natural nails, particularly regarding pain, heat, and damage. However, with proper technique and caution, these concerns can be minimized. Using a lower speed setting on the drill can help reduce heat and discomfort, while taking regular breaks and moisturizing can prevent excessive damage.Professional vs. DIYWhile professional nail technicians are skilled in using a nail drill, it is possible to achieve salon-quality results at home with practice and knowledge. However, if you are unsure or have specific concerns about using a nail drill on your natural nails, it is always advisable to consult a professional for guidance.Post-Drill CareAfter using a nail drill on your natural nails, it is crucial to provide proper post-drill care. Gently remove any dust or debris from your nails using a soft brush or a lint-free cloth. Apply a nourishing cuticle oil or cream to hydrate and protect your nails. Avoid applying polish immediately after drilling to allow your nails to recover and breathe.ConclusionUsing a nail drill on natural nails can be a game-changer for your nail care routine. With the right tools, technique, and precautions, you can achieve beautifully shaped and manicured natural nails in the comfort of your own home. Remember to prioritize nail health, and if in doubt, seek professional advice to ensure a safe and enjoyable experience.Quote InquiryContact Us
Using a Nail Drill for Beginners: A Comprehensive Guide
IntroductionIf you're a beginner interested in nail care and want to take your nail game to the next level, using a nail drill can be a game-changer. Nail drills are versatile tools that can help you achieve professional-looking nails at home. In this article, we will guide you through the basics of using a nail drill as a beginner, covering everything from choosing the right drill to practicing safe techniques. Let's get started!1. Understanding Nail DrillsBefore diving into the world of nail drills, it's essential to understand what they are and how they work. Nail drills are electric or pneumatic tools used to shape, file, and remove acrylic, gel, or natural nails. They consist of a handpiece, which holds the drill bit, and a power source that controls the speed and rotation of the drill. Nail drills come in various sizes, shapes, and power levels, making it important to choose the right one for your needs.2. Choosing the Right Nail DrillWhen selecting a nail drill as a beginner, there are a few key factors to consider:Power: Opt for a nail drill with adjustable speed settings, allowing you to start slow and gradually increase the speed as you gain confidence.Size and Weight: Look for a lightweight drill that is comfortable to hold and maneuver.Bits and Attachments: Ensure the drill comes with a variety of bits and attachments suitable for different nail treatments.3. Safety FirstUsing a nail drill involves working with sharp tools and potentially harmful chemicals. Prioritize your safety by following these guidelines:Wear safety glasses to protect your eyes from flying debris.Keep your nails and fingers away from the drill bit to avoid accidents.Apply a small amount of cuticle oil or petroleum jelly to your cuticles before drilling to minimize friction and prevent damage.4. Preparing Your NailsBefore using a nail drill, it's important to prepare your nails properly:Remove any existing nail polish.Trim and shape your nails with a nail clipper and file.Soak your nails in warm water to soften the cuticles.Gently push back the cuticles using a cuticle pusher.5. Using a Nail Drill for FilingNail drills are excellent tools for filing your nails quickly and efficiently:Start with a low speed and gradually increase it as you become more comfortable.Hold the drill perpendicular to your nail and gently move it from side to side, shaping your nails as desired.Avoid applying too much pressure, as it can lead to overheating or damage to your nails.6. Removing Acrylic or Gel NailsIf you're looking to remove acrylic or gel nails, a nail drill can make the process much easier:Use a coarse-grit sanding band or an appropriate drill bit to remove the top layer of the artificial nail.Be cautious not to drill too deeply, as this can damage your natural nails.Once the top layer is removed, soak your nails in an acetone solution to dissolve the remaining product.After soaking, use a cuticle pusher to gently remove any remaining residue.7. Maintaining Your Nail DrillProper maintenance of your nail drill is crucial to ensure its longevity and performance:Regularly clean the drill bits and attachments after each use to remove any product buildup.Apply a few drops of lubricating oil to the handpiece's moving parts to keep them running smoothly.Store your nail drill in a clean and dry place, away from moisture or extreme temperatures.8. Practice and PatienceUsing a nail drill is a skill that takes time and practice to master. Be patient with yourself and take the time to improve your technique. Start with simple tasks and gradually move on to more complex nail designs as you gain confidence.9. Seeking Professional AdviceIf you're unsure about using a nail drill or encounter any difficulties, don't hesitate to seek advice from a professional nail technician. They can provide guidance, recommend suitable products, and teach you proper techniques.10. ConclusionUsing a nail drill as a beginner can open up a world of possibilities for your nail care routine. With the right tools, techniques, and practice, you can achieve salon-quality nails in the comfort of your own home. Remember to prioritize safety, choose the right drill for your needs, and have patience as you develop your skills. Happy drilling!Quote InquiryContact Us
Nail Drill Set: How to Use and Get the Perfect Manicure
The Basics of Using a Nail Drill SetA nail drill set can be a game-changer for achieving the perfect manicure at home. Whether you're a professional nail technician or a DIY enthusiast, knowing how to use a nail drill set effectively is essential. In this article, we will explore the various aspects of using a nail drill set, from choosing the right bits to understanding the correct techniques. Let's dive in!Choosing the Right Nail Drill SetWhen it comes to nail drill sets, there are numerous options available in the market. However, not all sets are created equal, and it's important to choose one that suits your needs. Look for a set that includes a variety of drill bits, adjustable speed settings, and a comfortable grip. Additionally, consider the power source – whether it's corded or cordless – based on your preference and convenience.Understanding the Different Drill BitsA nail drill set typically comes with several interchangeable drill bits, each designed for specific purposes. Let's take a look at some of the most common drill bits:Barrel Bit: Ideal for shortening and shaping the nails.Cone Bit: Perfect for removing dead cuticles and cleaning under the nails.Cylinder Bit: Great for smoothing the surface of the nails.Mandrel Bit: Used for attaching sanding bands and other abrasive attachments.Flame Bit: Helps in refining the sidewalls and cuticle area.Preparing Your NailsBefore using a nail drill set, it's essential to prep your nails properly. Start by removing any nail polish and filing your nails to the desired length and shape. Next, soak your nails in warm water for a few minutes to soften the cuticles. Gently push back the cuticles using a cuticle pusher or an orangewood stick. Finally, wash your hands and dry them thoroughly.Mastering the Speed SettingsMost nail drill sets come with adjustable speed settings, allowing you to control the rotation speed of the drill bit. It's crucial to start with the lowest speed and gradually increase it as needed. Higher speeds are generally suitable for removing gel polish or acrylic nails, while lower speeds are ideal for shaping and buffing the natural nails. Experiment with different speed settings to find what works best for you.Using the Nail Drill SafelySafety should always be a top priority when using a nail drill set. Follow these guidelines to ensure a safe and enjoyable experience:Always wear safety glasses to protect your eyes from flying debris.Never apply excessive pressure on the drill bit, as it can damage the nails and cause discomfort.Take breaks in between to prevent overheating of the drill and your nails.Keep the drill moving in a sweeping motion to avoid creating heat spots on the nails.Never use a nail drill on infected or damaged nails; consult a professional instead.Mastering Nail Drill TechniquesUsing a nail drill set requires practice and patience. Here are a few techniques to help you achieve salon-worthy results:Filing: Hold the drill at a slight angle and use gentle movements to shape the nails.Buffing: Use a soft buffing bit to smooth out any ridges or imperfections on the nail surface.Cuticle Care: Use a cone bit to remove dead cuticles and clean under the nails.Refining: The flame bit is great for refining the sidewalls and cuticle area for a neater appearance.Post-Drilling Nail CareOnce you've finished using the nail drill set, it's important to take care of your nails. Start by washing your hands to remove any debris. Apply a nourishing cuticle oil to moisturize the nail beds and cuticles. Finally, apply a strengthening or hydrating nail polish to protect and enhance the health of your nails.Practice Makes PerfectUsing a nail drill set may seem intimidating at first, but with practice, you'll become more confident and skilled. Remember to start slow, follow safety precautions, and be patient with yourself. With time, you'll be able to achieve salon-quality results from the comfort of your own home!Quote InquiryContact Us
The Ultimate Guide to Nail Drill RPM: Everything You Need to Know
Understanding Nail Drill RPM: Unlocking the Secrets to Perfect NailsWhen it comes to achieving flawless nails, a nail drill is an essential tool for both professionals and DIY enthusiasts. However, one crucial aspect that often goes overlooked is the RPM, or revolutions per minute, of the nail drill. In this comprehensive guide, we will explore the importance of nail drill RPM, its impact on your nail care routine, and how to choose the right RPM for your needs. Let's dive in!1. What is Nail Drill RPM?Nail drill RPM refers to the speed at which the drill bit rotates. It is typically measured in revolutions per minute, indicating how many complete rotations the bit makes in a minute. The RPM of a nail drill can vary significantly, ranging from as low as 5,000 RPM to as high as 30,000 RPM or more.2. The Role of RPM in Nail CareThe RPM of a nail drill is a critical factor that determines the efficiency and effectiveness of your nail care routine. The right RPM can make all the difference between a smooth, precise, and safe experience, and a potentially damaging one.When the RPM is too low, the drill bit may not be able to effectively remove gel polish, acrylics, or hard gel. On the other hand, if the RPM is too high, it can generate excessive heat, leading to discomfort or even burns. Additionally, high RPMs can also cause the drill bit to skip or jump, resulting in uneven or jagged nail surfaces.3. Factors to Consider When Choosing Nail Drill RPMNow that we understand the significance of RPM in nail care, let's explore the factors to consider when selecting the right RPM for your nail drill:3.1 Nail Type and ConditionThe type and condition of your nails play a crucial role in determining the appropriate RPM. For natural nails or soft gel overlays, a lower RPM (around 5,000-10,000) is generally recommended to prevent damage. However, for acrylic nails or hard gels, a higher RPM (around 15,000-25,000) may be necessary to achieve optimal results.3.2 Skill Level and ExperienceYour skill level and experience with nail drills also influence the RPM you should choose. Beginners are advised to start with lower RPMs to familiarize themselves with the tool and minimize the risk of accidents. As you gain confidence and proficiency, you can gradually increase the RPM to suit your comfort level and desired outcomes.3.3 Bit Type and PurposeThe type of drill bit you use and its intended purpose should also be taken into account when determining the appropriate RPM. Different bits, such as carbide, diamond, or ceramic, have varying levels of durability and heat resistance. Some bits may perform better at higher RPMs, while others may require lower speeds for optimal performance.4. The Benefits of Adjustable RPM Nail DrillsInvesting in a nail drill with adjustable RPM offers several advantages. Adjustable RPM nail drills allow you to customize the speed according to your specific needs, making them versatile and suitable for various nail care tasks. Whether you are filing, shaping, or removing product, being able to adjust the RPM ensures precision and control.Furthermore, adjustable RPM nail drills are ideal for professionals who work with clients of different nail types and conditions. With the ability to fine-tune the RPM, you can provide a personalized and tailored experience for each client, enhancing customer satisfaction and overall quality of service.5. Safety Precautions When Working with Nail Drill RPMWhile nail drills can be incredibly useful tools, it is crucial to prioritize safety during every use. Here are some essential safety precautions to follow:5.1 Wear Protective GearAlways wear safety glasses to protect your eyes from any debris or filings. Additionally, using a dust extractor or mask can prevent inhalation of harmful particles, ensuring respiratory safety.5.2 Start SlowWhen using a nail drill with adjustable RPM, always start at the lowest speed setting and gradually increase as needed. This allows you to maintain control and minimize the risk of accidents or over-filing.5.3 Regular MaintenanceRegularly clean and sanitize your nail drill, including the drill bits, to prevent the buildup of bacteria or product residue. This not only ensures optimal performance but also promotes hygiene and reduces the risk of infections.6. Troubleshooting Common Issues Related to Nail Drill RPMEven with the right RPM, you may encounter certain issues while using a nail drill. Let's address some common problems and their possible solutions:6.1 OverheatingIf your nail drill is generating excessive heat, try reducing the RPM or taking short breaks to allow the drill bit to cool down. Applying a cooling gel or using a heat-resistant bit can also help alleviate overheating.6.2 Skipped or Uneven FilingIf you notice the drill bit skipping or creating an uneven surface, it may be due to a dull or worn-out bit. Replace the bit with a new one and ensure it is properly secured in the drill chuck to prevent wobbling.7. Expert Tips for Nail Drill RPMTo make the most out of your nail drill and RPM settings, consider the following expert tips:7.1 Practice on a Disposable SurfaceBefore working on your nails, practice using the nail drill on a disposable surface, such as a piece of foam or a practice hand. This allows you to get comfortable with different RPMs and techniques without the fear of damaging your nails.7.2 Invest in High-Quality BitsUsing high-quality drill bits can significantly improve your nail care experience. Invest in durable and reliable bits that are designed for specific tasks, ensuring better results and longevity.8. ConclusionNail drill RPM plays a vital role in achieving flawless nails. By understanding the importance of RPM, considering various factors, and following safety precautions, you can confidently choose the right RPM for your nail drill and enjoy a safe and efficient nail care routine. With practice, patience, and the right tools, you'll be well on your way to achieving salon-worthy nails in the comfort of your own home!Quote InquiryContact Us
The Ultimate Guide to Using a Nail Drill Pro Tool
IntroductionAre you tired of spending hours at the salon for a perfect manicure or pedicure? Look no further than the nail drill pro tool, a must-have gadget for every nail enthusiast. In this comprehensive guide, we will explore the different aspects of this versatile tool and how it can revolutionize your nail care routine. Whether you are a professional nail technician or a DIY enthusiast, the nail drill pro tool is sure to become your new best friend.1. Understanding the Nail Drill Pro ToolBefore diving into the world of nail drill pro tools, it's important to understand what it actually is. A nail drill pro tool is a handheld electric device that is used to shape, file, and buff nails. It consists of a motor, a handle, and various interchangeable attachments, such as sanding bands, drill bits, and polishing tools. With different speed settings and adjustable rotations, this tool offers precision and convenience to achieve salon-quality results at home.2. The Benefits of Using a Nail Drill Pro ToolUsing a nail drill pro tool has several advantages over traditional nail care methods. Firstly, it saves time and effort, allowing you to quickly and efficiently shape and file your nails. Additionally, it offers more control and precision, ensuring that you can achieve the desired nail shape and length without any hassle. Furthermore, the nail drill pro tool can be used for various nail treatments, including removing gel polish, calluses, and cuticles, making it a versatile tool for all your nail care needs.3. Choosing the Right Nail Drill Pro ToolWhen it comes to selecting a nail drill pro tool, there are a few factors to consider. Firstly, consider the power and speed options. Look for a tool with adjustable speed settings so that you can customize it according to your needs. Additionally, check for the durability and quality of the motor to ensure it will last long. It's also important to choose a nail drill pro tool that comes with a variety of attachments, allowing you to perform different nail care tasks effectively.4. Safety Precautions when Using a Nail Drill Pro ToolWhile the nail drill pro tool offers convenience and efficiency, it's crucial to prioritize safety when using it. Firstly, always start with the lowest speed setting and gradually increase it as needed. This prevents any damage or discomfort to your nails. Secondly, avoid applying excessive pressure on the nail surface to prevent overheating or damage. Additionally, always use the appropriate attachment for each task and ensure that it is securely in place before starting the drill. Lastly, take regular breaks during your nail care routine to give your nails and the tool a chance to cool down.5. Step-by-Step Guide to Using a Nail Drill Pro ToolNow that you are familiar with the basics, let's walk through a step-by-step guide on how to use a nail drill pro tool effectively:Start by preparing your nails – remove any existing nail polish and clean your nails thoroughly.Choose the appropriate attachment for the task you want to perform, whether it's shaping, filing, or buffing.Insert the attachment into the nail drill pro tool securely, ensuring it is aligned properly.Turn on the tool and select the desired speed setting. Begin with a low speed for more control.Hold the tool firmly but gently, positioning it at the desired angle on your nail.Start the drill and begin shaping or filing your nails, moving the tool in a gentle back-and-forth motion.Take breaks as needed to prevent overheating and to assess your progress.Once you achieve the desired nail shape, switch to a finer attachment for buffing and smoothing the nail surface.After completing the nail care routine, clean the attachments and store them properly for future use.Apply cuticle oil or moisturizer to nourish your nails and keep them healthy.6. Maintaining and Cleaning Your Nail Drill Pro ToolTo ensure the longevity and performance of your nail drill pro tool, proper maintenance is essential. After each use, clean the attachments using a brush or a cotton pad to remove any debris or residue. It's also important to periodically lubricate the tool's motor to keep it running smoothly. Store the tool in a clean and dry place, away from moisture or direct sunlight. Regularly check the attachments for any signs of wear and tear and replace them if necessary.7. Tips and Tricks for Using a Nail Drill Pro ToolHere are some additional tips and tricks to enhance your experience with a nail drill pro tool:Experiment with different attachments and speed settings to find what works best for you.Always file in one direction to prevent nail damage or splitting.Use a light touch when using the drill to avoid discomfort or pain.Invest in high-quality attachments to ensure better results and durability.Watch tutorial videos or seek professional guidance to learn advanced techniques.Regularly moisturize your nails and cuticles to keep them healthy and strong.8. Frequently Asked Questions about Nail Drill Pro ToolsQ: Can a nail drill pro tool damage my natural nails?A: When used correctly and with proper care, a nail drill pro tool should not damage your natural nails. However, it's important to follow safety precautions and avoid excessive pressure or prolonged use.Q: How often should I use a nail drill pro tool?A: The frequency of using a nail drill pro tool depends on your nail care needs. It's recommended to give your nails a break between sessions to prevent overuse.Q: Can beginners use a nail drill pro tool?A: Absolutely! Nail drill pro tools are designed for both professionals and beginners. Just start with a low speed setting and gradually increase as you gain more confidence and experience.9. ConclusionThe nail drill pro tool is a game-changer in the world of nail care. Its versatility, convenience, and precision make it an essential tool for achieving salon-quality nails at home. By understanding how to choose, use, and maintain this tool, you can take your nail care routine to the next level. So why wait? Get your hands on a nail drill pro tool and say goodbye to expensive salon visits!10. Keywordsnail drill pro tool, manicure, pedicure, nail care, salon-quality nails, shaping, filing, buffing, gel polish removal, callus removal, cuticle removal, step-by-step guide, safety precautions, maintenance, tips and tricks, frequently asked questionsQuote InquiryContact Us
The Ultimate Guide to the Nail Drill Pro 30000 RPM
IntroductionWhen it comes to professional nail care, having the right tools is essential. One such tool that has become increasingly popular among nail technicians and enthusiasts is the nail drill pro 30000 RPM. This powerful and versatile device offers a range of benefits, making it an invaluable addition to any nail care routine. In this article, we will explore the various aspects of the nail drill pro 30000 RPM, from its features and benefits to tips for usage and maintenance.Understanding the Nail Drill Pro 30000 RPMThe nail drill pro 30000 RPM is a high-speed electric nail file that is designed to shape, buff, and polish nails quickly and efficiently. It is equipped with a powerful motor capable of rotating the drill bit at 30,000 revolutions per minute (RPM), allowing for precise and professional results. This tool is commonly used in nail salons, but it is also becoming popular among individuals who want to achieve salon-quality results at home.Features and Benefits1. Adjustable Speed SettingsWith the nail drill pro 30000 RPM, you can easily adjust the speed settings to suit your specific needs. Whether you are working on natural nails or artificial enhancements, having this flexibility allows for greater control and precision.2. Versatile Drill BitsThe nail drill pro 30000 RPM comes with a range of drill bits that can be easily interchanged depending on the task at hand. From removing gel polish to shaping acrylic nails, there is a suitable drill bit for every nail care need.3. Efficient and Time-SavingThanks to its high-speed rotation, the nail drill pro 30000 RPM allows for a quicker and more efficient nail care routine. It can dramatically reduce the time spent on filing and shaping, making it a valuable tool for professionals who need to work quickly.4. Salon-Quality ResultsUsing the nail drill pro 30000 RPM can help you achieve salon-quality results at home. It allows for precise shaping, smoothing out imperfections, and creating a smooth and polished finish.Usage Tips1. Always start with a clean and dry nail surface before using the nail drill pro 30000 RPM. This will ensure that the drill bits are able to glide smoothly across the nails.2. Use a low speed setting when working on natural nails or sensitive areas to avoid causing damage or discomfort.3. Keep the drill bit moving in a gentle, circular motion to prevent friction and heat buildup.4. Avoid applying excessive pressure when using the nail drill pro 30000 RPM. Let the drill bit do the work, and allow for breaks to prevent overheating.Maintenance and Care1. Clean the drill bits after each use by removing any debris or nail dust. This can be done by gently brushing them or using a cleaning solution specifically designed for nail drill bits.2. Store the nail drill pro 30000 RPM in a clean and dry place to prevent dust or moisture buildup.3. Regularly inspect the power cord and device for any signs of damage. If any issues are detected, discontinue use and seek professional assistance.ConclusionThe nail drill pro 30000 RPM is a powerful and versatile tool that can greatly enhance your nail care routine. With its adjustable speed settings, versatile drill bits, and time-saving benefits, it is no wonder that this device has gained popularity among professionals and enthusiasts alike. By following the usage tips and properly maintaining the nail drill pro 30000 RPM, you can achieve salon-quality results in the comfort of your own home.Quote InquiryContact Us
Drill to Remove Gel Polish: The Ultimate Guide
The Importance of Using a Drill to Remove Gel PolishGel polish is a popular choice for many people who want long-lasting and chip-free manicures. However, removing gel polish can be a time-consuming and tedious process. One efficient method to remove gel polish is by using a drill. In this article, we will explore the various aspects of using a drill to remove gel polish and why it can be a game-changer for anyone who loves gel manicures.1. Understanding Gel PolishBefore diving into the process of using a drill to remove gel polish, it is essential to understand what gel polish is. Gel polish is a type of nail polish that is cured under a UV or LED lamp to create a hard and durable finish. Unlike regular nail polish, gel polish lasts longer and is less prone to chipping.2. Why Use a Drill?Using a drill to remove gel polish offers several advantages over traditional methods. First and foremost, it saves time and effort. Removing gel polish manually can take a considerable amount of time, especially if the polish is thick or has multiple layers. A drill, on the other hand, can quickly and efficiently remove the gel polish, reducing the overall time spent on the process.3. Safety PrecautionsWhile using a drill can be a time-saving solution, it is crucial to prioritize safety. Always ensure you are using a quality drill with the appropriate attachments and settings. Additionally, be mindful of the pressure applied and avoid excessive force to prevent damage to the natural nail bed. If you are unsure about using a drill, it is advisable to seek professional help.4. Choosing the Right Drill BitsOne of the keys to successfully removing gel polish with a drill is selecting the right drill bits. There are various types of drill bits available, each designed for specific purposes. When it comes to gel polish removal, diamond drill bits are highly recommended. These bits are known for their durability and effectiveness in removing gel polish without causing damage to the natural nail.5. Step-by-Step GuideRemoving gel polish with a drill involves a series of steps. Here's a step-by-step guide to help you navigate the process:Prepare your work area by laying down a towel or mat to catch any debris.Choose the appropriate drill bit for gel polish removal.Start the drill at a low speed and gently glide the drill bit over the gel polish, focusing on one nail at a time.Apply light pressure and let the drill do the work. Avoid excessive force to prevent damage to the nail bed.Continue working on each nail until the gel polish is completely removed.After removing the gel polish, use a buffer or file to smooth out the nails.Apply cuticle oil or a nourishing nail treatment to moisturize the nails.Finish off with a fresh coat of nail polish or leave the nails bare for a natural look.Clean the drill bits thoroughly after each use to maintain their effectiveness.Dispose of any debris in a safe and appropriate manner.6. Benefits of Using a DrillUsing a drill to remove gel polish offers several benefits. Firstly, it saves time and effort, allowing you to achieve salon-quality results in the comfort of your own home. Additionally, a drill provides more control and precision compared to manual methods, ensuring a thorough removal of the gel polish. Lastly, using a drill can also help prevent damage to the natural nails, as it reduces the need for excessive scraping or filing.7. Alternative Gel Polish Removal MethodsWhile using a drill is an efficient method, there are alternative ways to remove gel polish. Some popular methods include soaking the nails in acetone, using foil wraps, or using gel polish removal kits. These methods can be effective, but they may require more time and effort compared to using a drill.8. Maintaining Nail HealthAfter removing gel polish, it is essential to prioritize nail health. Give your nails a break from gel polish to allow them to breathe and recover. Apply cuticle oil regularly to keep the nails moisturized and healthy. If you notice any signs of nail damage or infection, consult a professional nail technician or a dermatologist.9. Frequently Asked QuestionsQ: Can I use a regular drill for gel polish removal?A: It is not recommended to use a regular household drill. Opt for a nail drill specifically designed for manicure purposes.Q: How long does it take to remove gel polish with a drill?A: The time can vary depending on the number of nails and the thickness of the gel polish. On average, it takes approximately 10-15 minutes to remove gel polish from all nails.Q: Can I reuse the drill bits?A: Yes, drill bits can be reused. However, it is essential to clean and sanitize them thoroughly after each use to prevent the spread of bacteria or fungus.10. ConclusionUsing a drill to remove gel polish is a time-saving and efficient method that can help you achieve salon-quality results at home. By following the proper safety precautions and using the right drill bits, you can remove gel polish effectively without causing damage to your natural nails. Remember to prioritize nail health and give your nails a break between gel manicures. With the right tools and techniques, you can enjoy beautiful and long-lasting gel manicures without the hassle of traditional removal methods.Quote InquiryContact Us